Tel/WhatsAapp:+86 13366396425
E-mail: chloe_xia@vleap.com.cn

Who this guide is for: brand owners, sourcing managers, DTC founders, and product developers who have never stood on a factory floor and want to understand — layer by layer, seam by seam — what is actually inside the custom handbag they are specifying. If you have ever approved a tech pack containing terms like “fusible interfacing,” “panel construction,” “binding tape,” or “pocket bag” without fully understanding what those components do — or what happens to the finished bag when a factory quietly removes them to win a price negotiation — this guide opens up a typical structured tote and walks through every layer, every panel, and every construction decision that separates a bag that feels premium from one that merely looks premium in photographs.

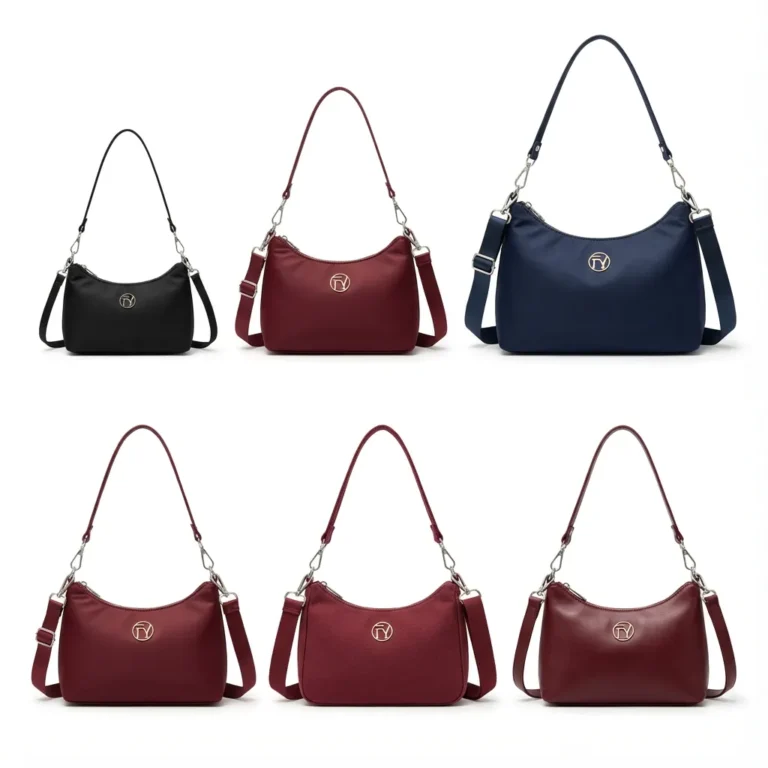
A finished handbag hides its own construction. When the consumer picks up a structured tote, she sees two materials — the exterior and the lining — and assumes the bag is essentially those two layers sewn together. She is wrong by a factor of three or four. Between the exterior surface her fingers touch and the lining her hand brushes when she reaches for her keys, there are typically three to five hidden layers — interfacing, foam, stiffeners, reinforcement patches, seam bindings — that determine almost everything she will come to love or hate about the bag: whether it stands upright on a restaurant floor or slumps into a puddle, whether the handles stay attached through two years of grocery runs or tear loose in month four, whether the top edge keeps its crisp line or collapses into a wavy frown.
These hidden layers are also where the economics of bag manufacturing live. The exterior material is visible, comparable, and contractually specified — a factory cannot substitute it without detection. The hidden layers are invisible, unverifiable by photograph, and rarely specified in detail — which makes them the first place a factory looks when it needs to reduce cost to win an order. The phrase for this is value engineering, and in handbag manufacturing it almost always means: thinner interfacing, no foam, a lighter stiffener, skipped reinforcement, raw seam edges. The bag that ships looks identical to the sample. The bag at month six does not.
This guide is the layer-by-layer walkthrough that lets you see inside the bag before you buy it — and specify each layer so it cannot be engineered out.
Before examining the layers, it helps to understand the order of operations on the factory floor. A structured tote passes through six stages, and each layer enters the bag at a specific point in this sequence.
| Stage | What Happens | Layers Involved |
|---|---|---|
| 1. Pattern cutting | The exterior material, lining fabric, interfacing, foam, and stiffeners are cut into panels using steel-rule dies or CNC cutters; every piece of the bag exists as a flat shape at this stage | All layers — cut flat, before any assembly |
| 2. Panel preparation | Interfacing is fused (heat-bonded) or sewn to the back of each exterior panel; foam is laminated where specified; edges are skived (thinned) where panels will fold or overlap | Exterior + interfacing + foam |
| 3. Surface work | Logos are debossed, embroidered, or printed; pockets are sewn onto panels; decorative stitching is applied — everything that is easier to do on a flat panel than on an assembled bag | Exterior panels |
| 4. Sub-assembly | The lining is assembled separately as its own complete “inner bag” — lining panels, pocket bags, zip pockets, and labels are sewn into a finished lining unit | Lining + pocket bags + reinforcement |
| 5. Assembly | The exterior panels are sewn together (front + back + gussets + base); the lining unit is inserted; the two are joined at the top edge; handles and hardware are attached | All layers converge |
| 6. Finishing | Edges are painted or bound, the bag is turned and shaped, stiffeners are inserted, threads are trimmed, and the bag passes final QC | Base stiffener, edge finishing |
The critical insight from this sequence: most quality decisions are locked in at stages 1–2, before the bag looks like anything. By the time a bag is recognizable as a bag, its interfacing, foam, and reinforcement are already inside — invisible and uncorrectable. This is why specifying the hidden layers in the tech pack matters more than inspecting the finished sample: the sample can be built honestly while the bulk run is value-engineered, and no photograph will reveal the difference.
The exterior of a structured tote is typically 5–9 separate panels: a front panel, a back panel, two gusset (side) panels, a base panel, and optionally a top band, pocket panels, and handle anchor patches. How these panels are drafted — the pattern engineering — determines the bag’s proportions, its seam placement, and a surprising amount of its durability.
| Pattern Decision | Premium Approach | Value-Engineered Approach | Consequence of the Cheap Version |
|---|---|---|---|
| Grain direction | Every panel cut with the material’s grain (or fabric warp) running vertically, so all panels stretch and age in the same direction | Panels nested for maximum material yield regardless of grain direction | Panels stretch differently under load; after months of use, one gusset bags out more than the other; the bag develops a subtle lean |
| Seam allowance | 10–13 mm seam allowances, consistent across all panels | 6–8 mm allowances to squeeze more panels from each material sheet | Seams hold less material; under load, stitches tear through the narrow allowance — the classic “seam blowout” at the base corners |
| Panel matching | Gusset pairs cut from adjacent areas of the same hide/roll so color and texture match perfectly | Panels cut from wherever material remains | Visible color or grain mismatch between left and right gussets — subtle in photos, obvious in person |
| Notches and registration marks | Alignment notches cut into every panel edge so the sewing operator joins panels at exactly the intended points | No notches; operators align by eye | Panel misalignment of 2–4 mm at seams; the top edge of the front panel sits visibly higher than the back; topstitching wanders |
Wherever two or more layers of leather or PU overlap — at folded edges, at handle attachments, under hardware — the combined thickness can become bulky and stiff. Skiving is the process of shaving the material thinner (often from 1.2 mm down to 0.5–0.6 mm) along these overlap zones before assembly, so folds lie flat and seams stay slim.
A properly skived bag has fold lines that look like single-thickness material and corners that turn crisply. An unskived bag has bulging fold edges, lumpy corners, and hardware that sits proud of the surface on a visible mound of compressed material. Skiving adds a production step per panel — which is exactly why it is among the first operations dropped in value engineering.
Specification language: “All folded edges, handle attachment zones, and hardware mounting points: skived to 0.5–0.6 mm before assembly. Fold edges must lie flat with no visible bulk ridge.”
Interfacing is the hidden fabric layer bonded or sewn to the back of every exterior panel. It is the single most important determinant of how the bag feels in the hand — whether the panels have substance and spring, or feel limp and hollow. It is also, gram for gram, the most frequently value-engineered component in the entire bag.
| Type | What It Is | Weight/Thickness | Hand-Feel Result | Typical Application |
|---|---|---|---|---|
| Fusible non-woven | A felt-like synthetic sheet with heat-activated adhesive on one side; ironed onto the panel back | 30–100 g/m² | Light body; smooths the panel surface and prevents the exterior from looking “empty” | Budget-to-mid bags; lining-side support; soft silhouettes |
| Fusible woven | A woven fabric (like a thin canvas) with heat-activated adhesive; fuses into a panel that flexes like a single thicker material | 60–150 g/m² | Moderate body with natural flex; the panel bends and recovers like quality garment construction | Mid-to-premium soft and semi-structured bags |
| Foam-backed interfacing (laminated) | Interfacing with a thin foam layer (1–3 mm EVA or PE foam) laminated to it | 1–3 mm foam + carrier | Cushioned, substantial, “padded” hand-feel; the panel resists fingertip pressure and springs back | Premium structured totes; the layer that creates the “expensive squeeze” |
| Microfiber backing | A dense microfiber sheet sewn or bonded to the panel | 0.6–1.2 mm | Firm, resilient body that flexes without creasing; the premium alternative to rigid boards | Premium-to-luxury structured bags; high-flex zones |
| Salpa (bonded leather board) | Reconstituted leather fiber board | 0.6–1.5 mm | Rigid, architectural; the panel holds a flat plane | Structured panels that must not flex — frame bags, box silhouettes (never on panels that fold) |
This is the most common value-engineering move in the industry, and its effects are precisely predictable:
| With Specified Interfacing | With Interfacing Removed or Downgraded |
|---|---|
| The bag stands upright when set down empty | The bag collapses into itself; the front panel folds inward |
| Panels feel substantial when squeezed — there is resistance and recovery | Panels feel like two thin sheets of material with air between them — the “hollow” feel that reads instantly as cheap |
| The exterior surface is smooth; seam allowances and pocket shapes do not show through | Every internal seam, pocket edge, and reinforcement patch telegraphs through the exterior as a visible ridge (“shadowing”) |
| The top edge holds a clean line | The top edge ripples and waves |
| Handles attached through interfacing + exterior distribute load across the fused composite | Handles attached through exterior alone concentrate load on the material — stretch marks radiate from the attachment points within weeks |
Specification language: “Body panels (front, back, gussets): fusible woven interfacing, minimum 90 g/m², full-panel coverage (not strip fusing). Front and back panels additionally laminated with 2 mm EVA foam. Fusing temperature/pressure per interfacing supplier’s data sheet; no delamination after 50-cycle flex test.”
The phrase “full-panel coverage (not strip fusing)” matters: a common partial-value-engineering move is to fuse interfacing only in strips along the panel edges (where a buyer checking the seams would feel it) while leaving the panel centers unfused (where the cost saving lives). The squeeze test exposes this instantly — the panel edges feel firm and the center feels hollow.
A thin foam layer (1–3 mm, typically EVA or PE foam) laminated between the exterior and the interfacing is what gives premium structured bags their characteristic tactile signature: press the panel with a fingertip and it yields slightly, then springs back — the cushioned, upholstered resistance that consumers describe as “feels expensive” without knowing why.
| Foam Decision | Effect |
|---|---|
| 1 mm foam, front + back panels only | Subtle cushioning on the two panels consumers touch most; minimal weight and cost addition; the efficient premium choice |
| 2 mm foam, all body panels | Full upholstered feel; the bag has uniform softness everywhere; the standard for premium structured totes |
| 3 mm foam | Maximum plushness; used on quilted designs and puffer-adjacent silhouettes; adds noticeable thickness at seams (requires skiving discipline) |
| No foam | The panel feels like exactly what it is: material + interfacing; acceptable for minimalist and soft silhouettes where “crisp” is the goal rather than “cushioned” |
Foam is also functional on specific panels: a foam-padded base panel cushions contents when the bag is set down hard; foam in a laptop compartment’s walls is protective, not just tactile.
Stiffeners are the rigid or semi-rigid elements that give a structured bag its architecture. Unlike interfacing (which is bonded to panels), stiffeners are discrete components inserted at specific locations.
| Location | Stiffener | Purpose | What Happens Without It |
|---|---|---|---|
| Base | Base board: 1.0–2.0 mm Salpa, HDPE, or fiberboard, cut 3–5 mm smaller than the base panel, inserted between base exterior and base lining (or as a removable insert) | Creates the flat, stable platform; the bag stands; contents sit level | The base sags under contents; the bag tips over when set down; metal base feet press dimples upward into the interior |
| Top edge | Top-edge stay: a strip of firm interfacing, light board, or piping cord run along the top opening seam | Keeps the opening’s line crisp and the mouth of the bag holding its intended shape | The top edge ripples, collapses inward, and develops the “tired mouth” look within weeks |
| Handle cores | Rolled handles are formed around a core of rope, leather, or molded plastic | The handle keeps a round, firm, comfortable grip profile | The handle flattens into a thin strap under load; digs into the hand; looks deflated |
| Gusset edges (optional) | Light board or heavy interfacing strips along the gusset fold lines | The gussets fold at clean, intentional lines rather than collapsing randomly | Gussets crumple inward in irregular folds; the bag’s profile looks accidental |
The removable-vs-permanent base decision: a permanently installed base board produces the most rigid platform but prevents the bag from ever packing flat. A removable base insert (housed in a lining pocket) delivers nearly identical in-use stability while enabling flat shipping and consumer storage. For most modern programs, the removable insert is the better engineering choice; specify it deliberately rather than letting the factory default to whatever is fastest.
Reinforcement components carry the bag’s structural loads at the points where forces concentrate. They are entirely invisible in the finished product and entirely decisive in whether the bag survives its second year.
| Stress Point | Load It Carries | Reinforcement Specification | Failure Mode Without It |
|---|---|---|---|
| Handle attachments | The full weight of the loaded bag, cycled thousands of times | A webbing or leather reinforcement patch (minimum 4 × 6 cm) sandwiched between exterior and interfacing at each attachment; handle stitched through all three layers with box-X bartack | The handle tears out of the panel, taking a flap of exterior material with it — the most catastrophic and most common structural failure |
| Strap D-ring tabs | The pulling force of the shoulder strap, multiplied by every step | D-ring tab stitched through a backing patch; box bartack; bonded nylon thread | The tab stitching pulls through; the strap detaches mid-carry |
| Zipper ends | The concentrated force of every open/close cycle terminating at the tape ends | Reinforcement bartack across the zipper tape ends; tape ends folded and captured in the seam, never raw | The zipper tape pulls away from the bag at the corner — the “zipper is separating” review |
| Base corners | The settled weight of contents, permanently, plus impact every time the bag is set down | Corner seams double-stitched; thread one Tex size heavier than body seams; optional corner reinforcement patches | Seam blowout at the base corners — the bag develops holes exactly where keys and coins collect |
| Pocket openings | 30–50 reach-in cycles per day at the slip pocket’s top edge | A 2 cm strip of fusible interfacing along the pocket opening; bar-tack at both pocket corners | The lining tears at the pocket corners within months — the “inside is falling apart” review |
These five reinforcements collectively add only minutes of labor per bag. They are nonetheless skipped with regularity in value-engineered production because every one of them is invisible at final inspection. The only protections are (a) explicit tech pack specification and (b) destructive testing of a sacrificial production unit — cutting one bag open to verify the patches and bartacks exist.
Specification language: “All five structural reinforcement points (handle attachments, strap tabs, zipper ends, base corners, pocket openings) per the attached reinforcement map. Buyer reserves the right to cut open one (1) randomly selected production unit per shipment to verify internal reinforcement; absence of any specified reinforcement constitutes a failed inspection for the lot.”
The lining is not a sheet of fabric draped inside the bag — it is a complete, separately assembled inner bag, with its own panels, its own seams, its own pockets, and its own quality decisions. (For the full fabric-by-fabric decoder — taffeta through jacquard through Alcantara — see our dedicated lining guide; this section covers the lining’s construction, which is a separate set of decisions from its fabric.)
| Decision | Premium Approach | Value-Engineered Approach | Visible Consequence |
|---|---|---|---|
| Attachment method | The lining is “bagged out” — joined to the exterior only at the top seam and around zip pockets, hanging freely inside (a floating lining) | The lining is glued to the exterior panels in spots or sheets | A floating lining moves naturally and can be repaired/replaced; a glued lining bubbles and wrinkles when the adhesive ages, and wrinkles telegraph to the exterior |
| Seam finishing | All lining seams serged (overlocked) or bound with tape; no raw edges anywhere a hand can reach | Raw cut edges inside | Raw polyester edges fray into wispy threads that catch on contents; the visible fray reads as “unfinished” |
| Bottom corners | The lining is drafted 3–5 mm shorter than the exterior so it sits taut without pooling | Lining cut to identical dimensions as the exterior | Excess lining pools at the base in wrinkled folds; items disappear under the loose fabric |
| Pocket bag construction | Pocket bags from dedicated pocketing fabric, double-stitched at the bottom | Pockets formed by stitching a patch of lining fabric directly onto the lining wall | Patch pockets sag, stretch, and tear at the corners under the daily weight of a phone |
| Zip pocket window | The interior zip pocket set into a clean welt (windowed) opening with reinforced corners | The zipper sewn on top of a slit cut in the lining | The slit’s corners tear progressively; the welt version lasts the life of the bag |
The final layer of construction decisions concerns how the panels’ raw edges are contained — the one place where internal construction becomes visible and touchable.
| Treatment | Where It Appears | What It Does | Quality Signal |
|---|---|---|---|
| Binding tape (bound seams) | Interior seams of unlined or semi-lined bags; the base seam inside many totes | A folded strip of fabric or PU wraps the raw seam allowance and is stitched through, encasing the cut edges completely | The hallmark of honest interior construction — open the bag, look at the base seam: bound = built to be seen; raw = built to be hidden |
| French seams / turned construction | Soft, unlined designs | The seam is sewn, turned, and sewn again so all raw edges are enclosed inside the seam itself | Garment-grade finishing; rare and premium in bags |
| Edge paint | All exposed cut edges: handles, straps, flap edges, top edges | Multi-coat sealed and painted edges (covered in depth in our dedicated edge-paint guide) | The thumb test — the single most-touched quality signal on the bag |
| Folded (turned) edges | Top edges, pocket tops, strap edges on premium leather goods | The material’s edge is skived, folded under, and stitched — no cut edge is ever exposed | The most labor-intensive edge treatment; the luxury-house standard |
| Piping / welt cord | Seams of structured totes and frame bags | A fabric- or leather-wrapped cord sewn into the seam | Defines the bag’s silhouette edges with a crisp line; also armors the seam against abrasion (the piping wears before the seam does) |
Every seam in every layer is executed at a stitch density (SPI — stitches per inch) that is itself a specification. As covered in our craftsmanship tier guide, visible topstitching at 8–9 SPI with ±10% consistency reads as premium, while 4–5 SPI with visible wobble reads as budget — but the construction-layer point is different: structural seams and reinforcements have their own SPI logic (denser is not always better; over-dense stitching on a structural seam perforates the material like a postage stamp and weakens it). Structural seams run 6–8 SPI with heavy bonded nylon; bartacks are dense by design but short; topstitching carries the visual standard. A tech pack that specifies one SPI number for the whole bag is under-specified.
Pulling the whole guide together — here is the inspection sequence that verifies the hidden layers exist, performable on any PP sample in under ten minutes:
| # | Test | Method | What It Verifies |
|---|---|---|---|
| 1 | The stand test | Place the empty bag on a flat surface | Base stiffener + interfacing (the bag stands square without support) |
| 2 | The squeeze test | Press each panel center and each panel edge between thumb and fingers | Full-panel interfacing + foam (uniform cushioned resistance — no hollow center) |
| 3 | The shadow test | Hold the bag under raking light; examine the exterior surface | Adequate interfacing weight (no internal seams or pocket shapes telegraphing through) |
| 4 | The reach-in test | Reach inside; run fingers along every interior seam and pocket edge | Serged/bound lining seams; reinforced pocket openings; no raw edges |
| 5 | The hang test | Load the bag with 4–5 kg; lift by the handles; hold 60 seconds; inspect attachment zones | Handle reinforcement patches (no stretch marks, no puckering radiating from attachments) |
| 6 | The corner pinch | Pinch and flex each base corner | Double-stitched, reinforced corners (no thread gaps opening under flex) |
| 7 | The destructive teardown (bulk only) | Cut open one sacrificial production unit | Every hidden layer — interfacing coverage, foam, reinforcement patches, bartacks — exactly as specified |

FYBagCustom is Your Trusted Custom Bag Manufacturer in China, with 15+ years of manufacturing experience, 10+ production lines, and a construction philosophy built on the principle that the layers nobody sees determine the reviews everybody reads. For brands specifying construction quality, our capabilities include:
Explore our custom bag collection or contact our development team to discuss construction specifications, reinforcement maps, and teardown verification for your program.
A premium handbag is not a premium exterior material — it is a stack of correct decisions in layers the consumer will never see: interfacing that fills the panels, foam that cushions the squeeze, stiffeners that hold the architecture, reinforcements that carry the loads, and a lining built like a second bag. For B2B buyers specifying construction, three core takeaways:
If you are developing a structured bag and want every layer — from the skived fold edges to the box-X bartacks — built as specified and verifiable, contact FYBagCustom to discuss construction engineering, reinforcement mapping, and teardown-verified production. Full-construction samples in 5–7 days.
FYBagCustom builds the layers nobody sees — full-panel fusing, foam lamination, five-point reinforcement, floating linings — and welcomes teardown verification on every production run. Construction-complete samples in 5–7 days.
Start Your Custom Bag Project →