Tel/WhatsAapp:+86 18011919834
E-mail: chloe.x@fybagcustom.com

Tel/WhatsAapp:+86 18011919834
E-mail: chloe.x@fybagcustom.com
Send Your Inquiry Today

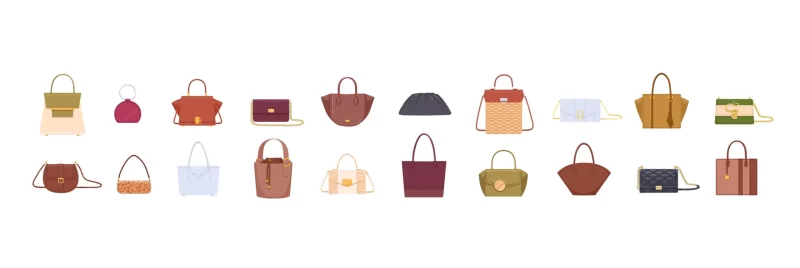
Who this guide is for: premium-tier brand owners producing structured and frame bags — the handbags whose silhouettes are drawn rather than draped, and whose difference from a soft pouch is, literally, a skeleton. Structure systems are having their commercial moment: the FW26 season’s ladylike revival — the structured top-handle, the bowler, the box bag, the frame purse — runs on architecture, and a brand producing those silhouettes needs a manufacturer fluent in the systems that hold them. This guide covers both families of that architecture: the shown structure — metal doctor-bag frames and kiss-lock frames, where the skeleton is the design and the opening mechanism is the product’s signature ritual — and the hidden structure — internal skeletons of boning, wire, and thermoformed shells, structured interlinings, and base shapers, the invisible engineering that makes a bag stand at retail and hold its drawn shape through years of use. It covers how frames attach to bodies (the junction where frame bags fail), how hidden skeletons are graded and placed, the weight-versus-structure trade every structured bag negotiates, and the silhouette engineering behind the season’s shapes. Structure is the least-visible line on a spec sheet and the most visible quality on a shelf; this guide closes that gap.
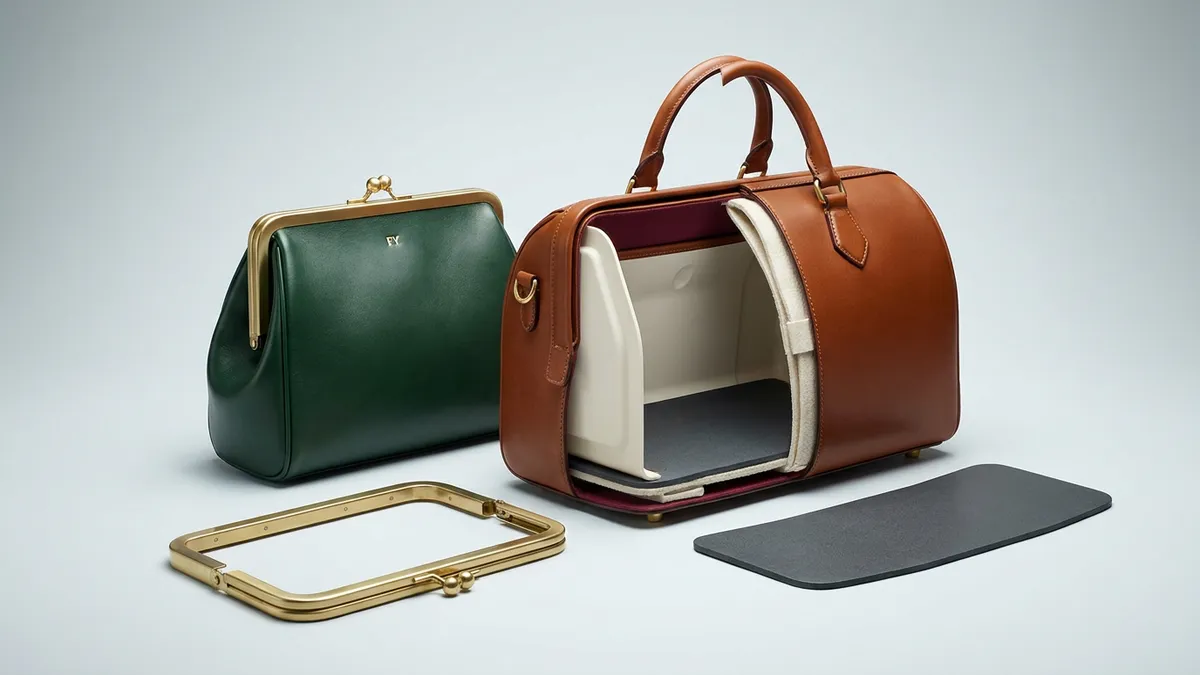
A structured handbag holds its shape through a combination of frame geometry, reinforced panels, and base support. A metal frame controls the opening; interlining and internal stiffeners support the body; a base shaper helps distribute the contents’ weight. The right combination depends on how the bag should look, open, feel, and carry a load.
For brand owners, sourcing managers, and product developers creating structured handbags, the key decision is not simply which stiffener to buy. It is how the complete construction will perform after the exterior, lining, hardware, handles, and contents are brought together.
| System | Typical components | Main job |
|---|---|---|
| Visible structure | Hinged metal frames, kiss-lock frames, rigid top frames | Defines the opening, supports the top profile, and controls closure operation |
| Hidden structure | Interlining, boning, wire, molded shells, panel boards, base shapers | Supports the silhouette, reinforces selected areas, and controls the base under load |
The systems often work together. A kiss-lock purse may have a rigid opening and a deliberately soft body, while still needing a supported base. A frameless bowler can rely on shaped reinforcement to retain its curved profile.
Start by describing the required behavior: must the bag stand empty, stay upright with its normal contents, remain soft against the body, or protect a particular item? Those requirements determine where rigidity is useful and where it becomes unnecessary weight.
A hinged metal frame typically uses two sections connected at the sides. Frame profile, hinge travel, and closure position establish the opening that the pattern must fit. Steel, brass, and cast alloy components can serve different designs; the material name alone does not establish strength, weight, or durability.
| Frame detail | What to specify | What to verify on the assembled bag |
|---|---|---|
| Profile and dimensions | Opening width, height, curvature, channel dimensions, and dimensional tolerances | Pattern fit, symmetry, usable access, and closure alignment |
| Hinges | Intended opening angle and any required hold-open behavior | Smooth movement, appropriate resistance, and clearance from the body and lining |
| Closure | Clasp, turn-lock, push-lock, or other mechanism; target operating feel | Secure engagement without forcing the frame halves together |
| Finish | Approved color and surface sample; wear requirements | Finish consistency, handling marks, and wear at contact points |
| Load path | Locations of handles, strap loops, and reinforcing parts | Whether carrying forces enter the frame, body, or both |
A wide opening can make a framed work tote or structured makeup case easier to load. Check that advantage with representative contents: a frame’s outside dimensions do not tell you the usable opening after hinges, lining, and pockets are installed.
Procurement detail: approve a dimensioned hardware drawing and a physical frame sample before freezing the body pattern. A later change in frame curvature or channel width can require pattern and attachment revisions.
The junction between a rigid frame and a flexible body must withstand both opening movements and the loads imposed by the design. Select the attachment method with the frame supplier and bag manufacturer; the methods below are not interchangeable on every frame.
| Method | Construction | Main controls |
|---|---|---|
| Channel-and-adhesive, or glued-in | The finished body edge enters a frame channel with adhesive; suitable designs may include a cord filler | Channel fit, edge thickness, adhesive compatibility, application, and full cure |
| Sewn-in | Thread passes through prepared frame holes and the bag edge | Hole finish, stitch placement, thread protection, tension, and reinforcement against tearing |
| Glued-and-sewn | Adhesive positions the edge and stitching adds a mechanical connection | Compatibility of both processes and space for the combined edge build-up |
| Crimped or clamped | A compatible frame is compressed around the prepared edge | Controlled compression, protected tooling, and checks for material cutting or frame distortion |
The American Sewing Guild’s frame construction guide distinguishes attachment types and explains why channel width, body thickness, and positioning matter. For production, follow the selected hardware and adhesive specifications rather than copying a universal glue quantity or drying time.
Corners deserve particular attention because the body changes direction near the hinges and can be pulled as the mouth opens. Check edge insertion, local bulk, reinforcement coverage, and lining clearance on both sides. A neatly assembled corner can still be weak if the adhesive is incompatible or the frame grips too little material.
Sewing is not automatically stronger than gluing: poorly finished holes can abrade thread, and closely spaced stitches can weaken a thin edge. Likewise, additional adhesive cannot compensate for an unsuitable channel fit. Validate the complete junction after curing and again after repeated opening.
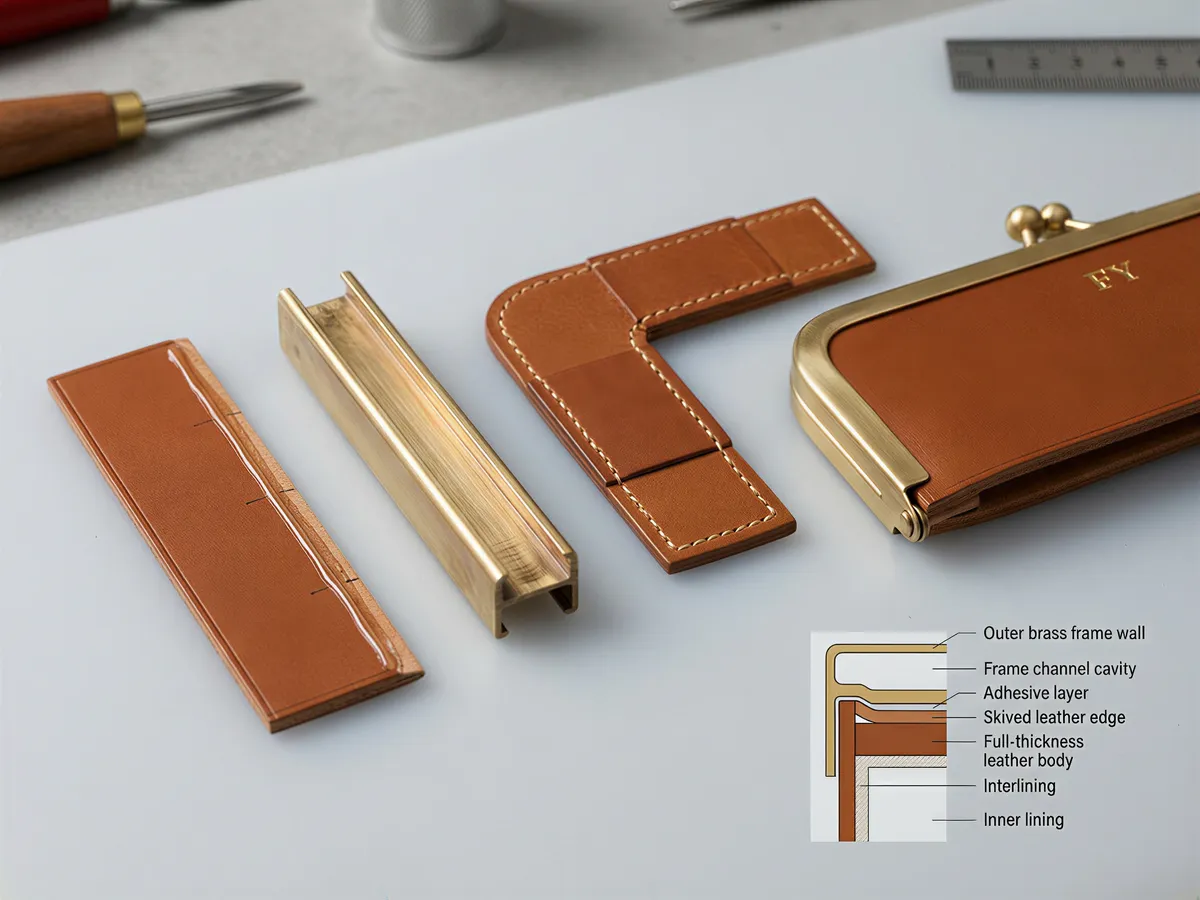
A kiss-lock frame closes when two knobs move past one another and retain the frame in its closed position. Knob geometry, frame alignment, and the assembly’s elastic behavior affect the resistance the user feels.
The mechanism appears in sizes from coin purses to full handbags. It can also support related purse-wallet and evening clutch collections, but a small frame’s operating feel should not simply be copied to a larger, heavier design.
Evaluate the closure on the finished bag, both empty and with its intended contents. Body tension and overfilling can affect alignment even when an unattached hardware sample works correctly.
Closure sound can be part of the approved product feel, but a loud click does not demonstrate secure retention. Record the desired feel against an approved sample and agree how production consistency will be checked. If operating force is measured, define the measurement point and method so readings are comparable.
Hidden reinforcement sits within the body construction, often between the outer material and lining. Its job is to support particular panels or lines while allowing the bag to open and move as intended.
Woven or nonwoven interlining adds body to a panel without necessarily making it rigid. Depending on the selected material, it can be fused, bonded, or sewn into the construction. Grade, thickness, placement, and bonding conditions all affect the result.
Evaluate a layered swatch using the actual exterior material. It should reveal changes in hand feel, surface appearance, flexibility, and bond behavior before the full sample is assembled. For fusible products, use the manufacturer’s application instructions: Vlieseline’s Decovil I guidance, for example, is specific to that product, not a universal setting for bag interlinings.
Boning strips or shaped wire support lines rather than entire panels. They can stabilize a curved top edge, preserve a bowler profile, or help a bucket bag’s rim retain its shape.
Channel placement and end protection matter as much as stiffness. Reinforcement should not migrate, poke through the lining, or create a visible ridge on the exterior. Check the ends and joints after flexing the assembled sample.
Suitable molded EVA or thermoplastic components can support three-dimensional forms such as a bowler dome or protective makeup case. Specify the actual material grade, thickness, and shape rather than treating all molded shells as equivalent.
Review shell edges, impact behavior, flexibility, and compatibility with the covering and adhesive. A shell that retains its shape may still need cushioning to protect its contents; structural stiffness and impact protection are separate requirements.
Fiber-based boards and plastic sheets can support flat bases, backs, fronts, or flaps. Their performance depends on material grade, thickness, unsupported span, and exposure conditions. Texon’s bag reinforcement range illustrates why reinforcement should be selected for a defined function rather than specified only as “board.”
Trim and position edges so they do not create abrupt steps beneath the exterior. Check moisture response and edge protection where the intended use makes them relevant.
A practical starting point for a structured top-handle bag is a rigid base, firm front and back panels, more flexible gussets, and local reinforcement at handle anchors. A box bag may intentionally need much greater rigidity throughout.
Document each zone separately. “Make the whole bag stiff” leaves too much room for interpretation and can produce excessive weight, restricted opening, or visible reinforcement edges.
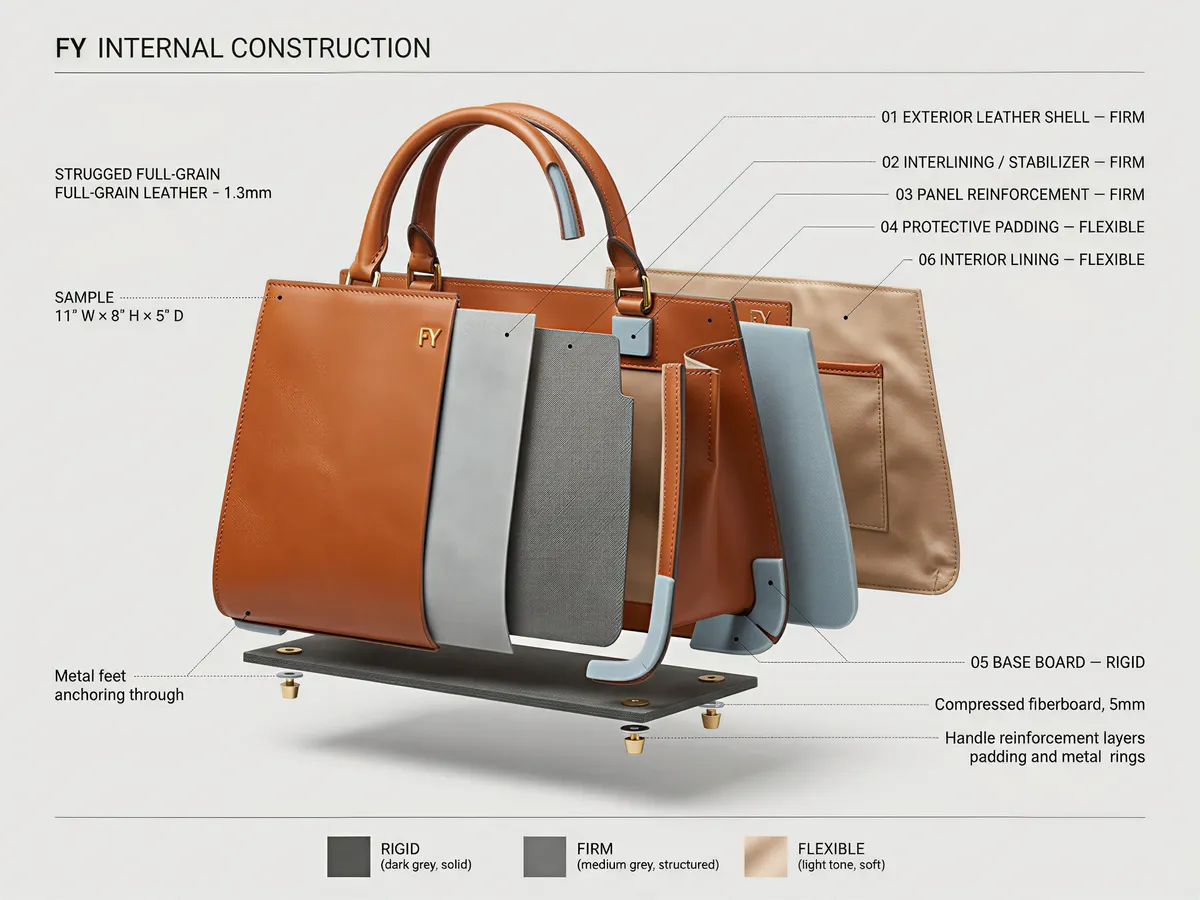
A base shaper helps the bag keep a defined footprint and limits sagging under its contents. Standing stability also depends on the bag’s proportions, load distribution, and support points; a rigid insert alone does not guarantee that a tall or unevenly loaded bag will stand.
Built-in base shapers are enclosed within the base construction. They can provide a consistent floor, but their size, edges, and placement must work with seams and lining assembly.
Removable base shapers sit inside the finished bag. They can add optional support to soft totes and hobos, and can be removed for replacement or access during cleaning. Removability does not make the insert or bag washable; care instructions must suit the materials.
Feet need load-spreading reinforcement. Their fasteners should work with an appropriate backing or reinforced base assembly, with protected ends inside the bag. The correct arrangement depends on the foot design and base construction; driving a fastener into a board is not, by itself, a durability specification.
Approve the floor under a defined load and loading pattern. Check bowing, rocking, tipping, fastener impressions, and whether the insert shifts or presses into the lining.
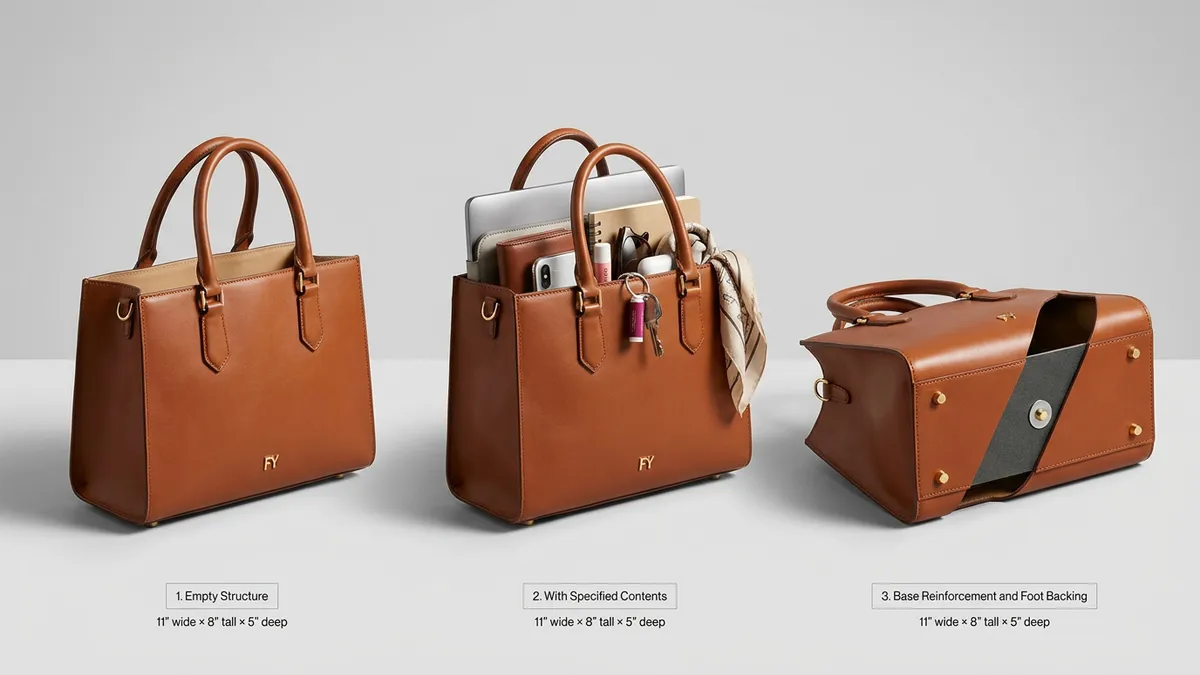
These are development starting points, not fixed recipes. Scale, opening design, outer material, and carrying load can change the required construction.
| Silhouette | Starting structure | Priority sample check |
|---|---|---|
| Top-handle bag | Firm front and back, supported gussets, rigid base, reinforced handle anchors | Standing behavior and distortion around the handles |
| Bowler | Shaped interlining or molded reinforcement, supported curved top, stable base | Dome symmetry and opening without flattening the profile |
| Box bag | Rigid panels or shell with controlled edges and a compatible opening | Corner alignment, edge bulk, and closure fit |
| Frame purse | Kiss-lock frame, patterned soft body, base support as required | Balanced fullness, corner attachment, and closure operation |
| Doctor bag | Hinged top frame, supported body panels, reinforced base | Usable access, hinge clearance, and load transfer |
| Structured shoulder bag | Firm main panels with more flexible areas against the body | Carrying comfort and silhouette retention |
For an FW26 collection built around top-handle, bowler, or frame-purse references, translate each selected image into these construction decisions. The season can guide the design brief, but reinforcement should still be specified against the product’s intended use and service requirements.
Set an empty-weight target alongside dimensions and capacity. Frames, feet, boards, shells, lining, and pockets all contribute to the mass the customer carries before adding belongings.
Weigh the major components during development. Reduce unnecessary reinforcement in low-demand zones, compare alternative frame constructions at the required strength, and consider shaped shells where they can replace heavier assemblies. Do not assume “alloy” always means lighter or “foam” always means adequate support; compare actual parts.
Total carried weight = finished empty bag weight + intended contents.
Use that total when evaluating handles, straps, and anchors. Where handles attach to the frame, the hardware and frame-to-body junction need particular attention. Where handles attach to the body, local reinforcement must carry the load without distorting adjacent panels.
| Failure | Possible contributors | Development response |
|---|---|---|
| Hinge loosening or binding | Component wear, misalignment, interference, or distortion | Cycle the assembled frame and inspect movement, play, and alignment |
| Frame-corner pull-out | Poor channel fit, incomplete bonding, insufficient insertion, or weak edge reinforcement | Examine the corner cross-section and repeat opening and attachment tests after full cure |
| Kiss-lock resistance changes | Contact wear, altered alignment, or permanent deformation | Compare closure behavior before and after cycling; inspect contact surfaces |
| Skeleton print-through | Abrupt reinforcement edges, insufficient cushioning, or layer movement | Adjust edge transitions and placement; inspect under angled light after handling |
| Shell cracking or permanent dents | Unsuitable grade, local thinning, sharp transitions, or exposure conditions | Test representative molded parts and assembled bags under agreed conditions |
| Base bowing or rocking | Inadequate stiffness for the span, uneven loading, or poor foot alignment | Reassess board grade, support geometry, and realistic contents placement |
| Loss of shape or delamination | Repeated flexing, bond deterioration, moisture, heat, or material creep | Evaluate the complete layer assembly under relevant conditioning and use simulations |
A short sample test should not be presented as proof that the bag will retain its shape for a stated number of years. Record the conditions tested and the observed results so the buyer can judge what the evidence supports.
| Product | Structure to discuss |
|---|---|
| Top-handle handbag | Graded panel reinforcement, supported base, and reinforced handle attachments |
| Evening clutch | Kiss-lock frame or rigid opening, appropriate base, and finished interior |
| Doctor-frame work tote | Wide-opening frame, reinforced body, and base suited to the contents |
| Bowler | Shaped dome reinforcement, supported top line, and stable floor |
| Structured laptop bag | Panel support, device cushioning, and reinforced base |
| Kiss-lock purse-wallet | Small frame with body fullness and operating resistance suited to its size |
| Soft tote upgrade | Removable base insert with covered edges and secure fit |
| Structured crossbody | Graded reinforcement, supported back, and reinforced strap anchors |
For daily commuting and work, prioritize carrying load, access, and comfort. For gift and promotional collections, review operating feel, presentation, and repeatable assembly within the target cost. For travel and adventure, define the relevant packing, handling, and protection requirements rather than assuming that a rigid exterior provides sufficient protection.
Leather, PU, velvet, structured canvas, and technical nylon or polyester respond differently to heat, pressure, adhesive, and reinforcement edges. Approve the layered construction using the intended exterior material and finish.
Specify metal frame color against a physical reference and compare it with the bag’s other hardware. Review engraved or embossed frame logos for depth, position, readability, and their effect on the finish.
Plan body branding before assembly. Embossed details need a compatible material and backing; embroidery needs access and suitable stabilization; heat-transfer decoration requires heat and pressure that the selected layers can tolerate. Establish the sequence on a sample rather than assuming every decoration belongs before or after reinforcement.
Embellished frame tops and decorative kiss-locks add weight and can introduce snagging or clearance concerns. Multi-function interiors add pockets and dividers that can restrict access or alter load distribution. Include both in the structural sample, not only in the final styling review.
Agree the test method, conditions, and acceptance criteria before approving production. The table below is a planning framework, not a claim that a particular FYBagCustom sample has passed these tests.
| Check | Define before testing | Inspect and record |
|---|---|---|
| Standing and loaded floor | Level surface, contents mass and distribution, observation time | Tipping, rocking, base deflection, and recovery after unloading |
| Silhouette retention | Sample revision, reference dimensions, empty and loaded states | Profile changes, symmetry, and permanent deformation |
| Hinge cycling | Cycle count, opening angle, rate, and inspection intervals | Play, binding, alignment, and body interference |
| Closure operation | Approved feel or force range, measurement method, contents condition | Engagement, opening resistance, contact wear, and any specified sound |
| Frame attachment | Opening sequence, attachment loading method, and cure conditions | Edge movement, corner separation, torn material, and damaged stitches |
| Print-through | Lighting direction, viewing distance, and preconditioning | Visible reinforcement edges, ridges, bubbles, and surface marks |
| Drop and impact | Contents, height, orientations, repetitions, and impact surface | Shell cracks, frame distortion, attachment damage, and closure function |
| Material and bond conditioning | Relevant temperature, humidity, duration, and recovery period | Delamination, softening, distortion, and changes in closure or shape |
| Weight and carrying system | Empty-weight tolerance and agreed handle/strap loading procedure | Finished mass, anchor movement, and local distortion |
Keep the tested sample ID, actual conditions, before-and-after photographs, results, and corrective actions together. Define the production inspection plan separately, including which checks are performed on every unit and which use an agreed sampling plan. Development testing and shipment inspection answer different questions.
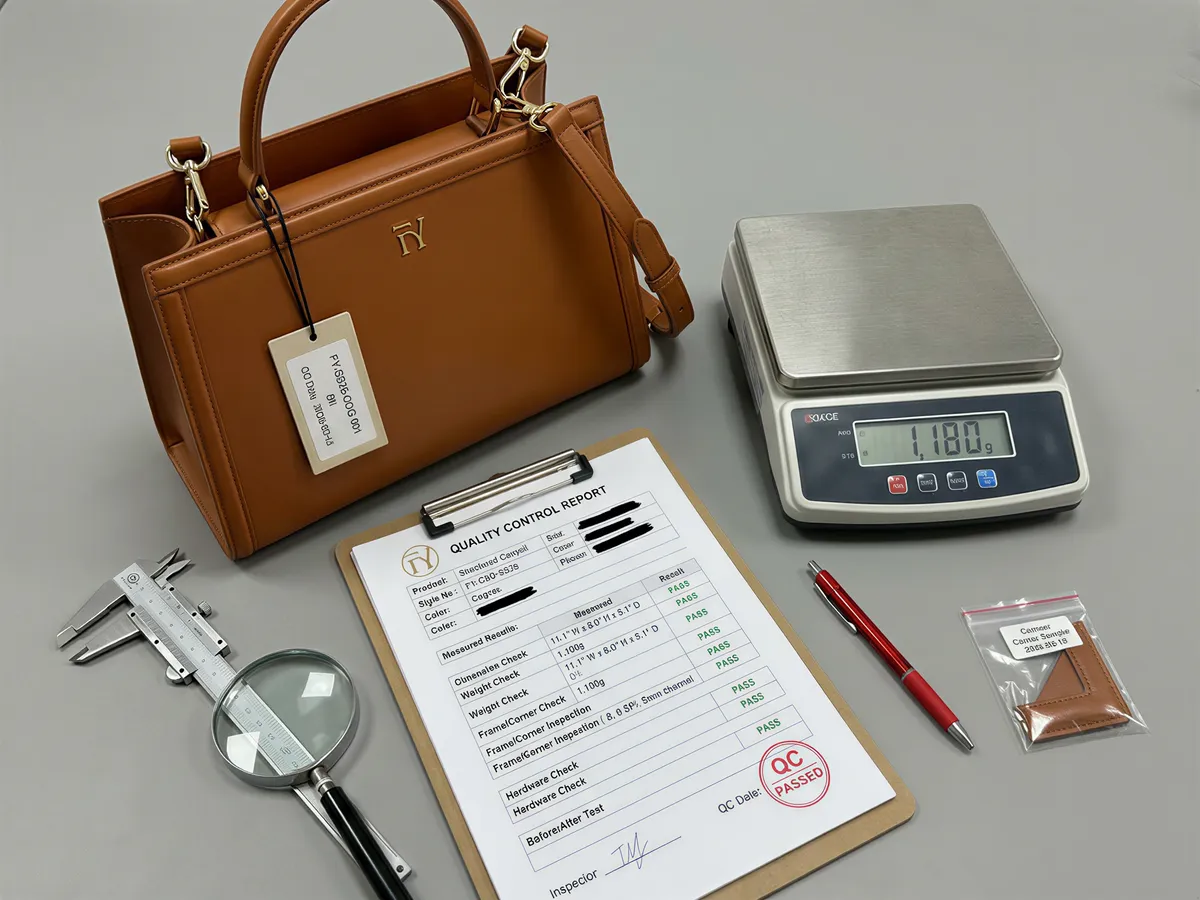
A reference photograph communicates appearance. A sourcing brief must also communicate performance and approval requirements.
For quotations, ask suppliers to separate hardware tooling, molding tools, sample charges, and unit costs where applicable. Confirm tooling ownership, minimum order quantities for custom finishes, and whether hardware availability affects the sample schedule. Comparing these details makes two superficially similar quotations much easier to evaluate.
Use the construction requirements above to brief FYBagCustom and agree the scope for your project. Confirm the proposed materials, available attachment processes, tooling needs, and validation plan against the specific design.
Coordinate embossed or embroidered branding, embellished frames, heat-transfer details, and multi-function interiors with the assembly sequence and sample checks.
A related range might include purse-wallets, clutches, and handbags with coordinated frame finishes. Larger formats such as totes, laptop cases, and makeup cases need their own load and access requirements.
For structured crossbodies and shoulder bags, include carrying comfort in the approval criteria. Define separate briefs for commuting, gift, and travel uses, even when the products share materials or branding.
Explore the custom bag range and ask our team to review the structure requirements of your current collection.
Sample timing depends on frame availability, custom tooling, material sourcing, and the number of revisions. Contact our team to confirm the schedule and deliverables for your design. Approve construction, weight, closure operation, and recorded test results together before releasing the final specification for production.
The quality of a structured bag is determined by much more than the exterior material.
A successful design requires the frame, body reinforcement, base, opening mechanism, weight and load-bearing areas to work as one system.
For brands developing structured handbags, the most important decisions are therefore:
When these decisions are made during development rather than after sampling, the result is a bag that not only looks structured when new, but is engineered to maintain the intended silhouette during real use.
If you are developing a structured handbag, kiss-lock purse, doctor-frame bag, box bag or another frame-based design, contact FYBagCustom with your drawing, reference image or tech pack.
Our team can review the silhouette, material and intended use and propose an appropriate frame and internal structure solution for sampling.
No. Many structured bags use hidden reinforcement and a supported base without a visible frame. A metal frame is useful when the design requires a controlled rigid opening or a particular closure mechanism.
Neither method is universally better. Performance depends on the frame design, body material, edge preparation, assembly controls, and intended load. Compare complete samples using the agreed attachment and opening tests.
It can improve the footprint and reduce floor sag, but it cannot guarantee an upright stance. Sidewall support, proportions, and load distribution also matter. Test the intended bag with the proposed insert.
Start with a component weight breakdown. Reduce rigidity where it is unnecessary and compare alternative frames, reinforcement grades, and base constructions. Verify that any reduction still meets the required shape, comfort, and durability criteria.
Approve a traceable final sample, material and reinforcement specifications, frame drawing and finish, empty-weight tolerance, quality criteria, and the inspection plan. Include the agreed test records so appearance approval does not become a substitute for performance approval.
FYBagCustom builds both architectures — kiss-lock and doctor frames with calibrated snaps and reinforced corners, and graded internal skeletons, shells, and base shapers that keep the season’s structured silhouettes drawn for years. Standing samples in 7–10 days.
Start Your Custom Bag Project →